SimFlyPad released the free “Streaming Screen” panel starting from version 3.5.0. Through this panel, you can transfer up to four pop-up windows to SimFly Pad. This feature is particularly useful for users who want to use an iPad as a remote display for real-time instrumentation.
Basic Usage
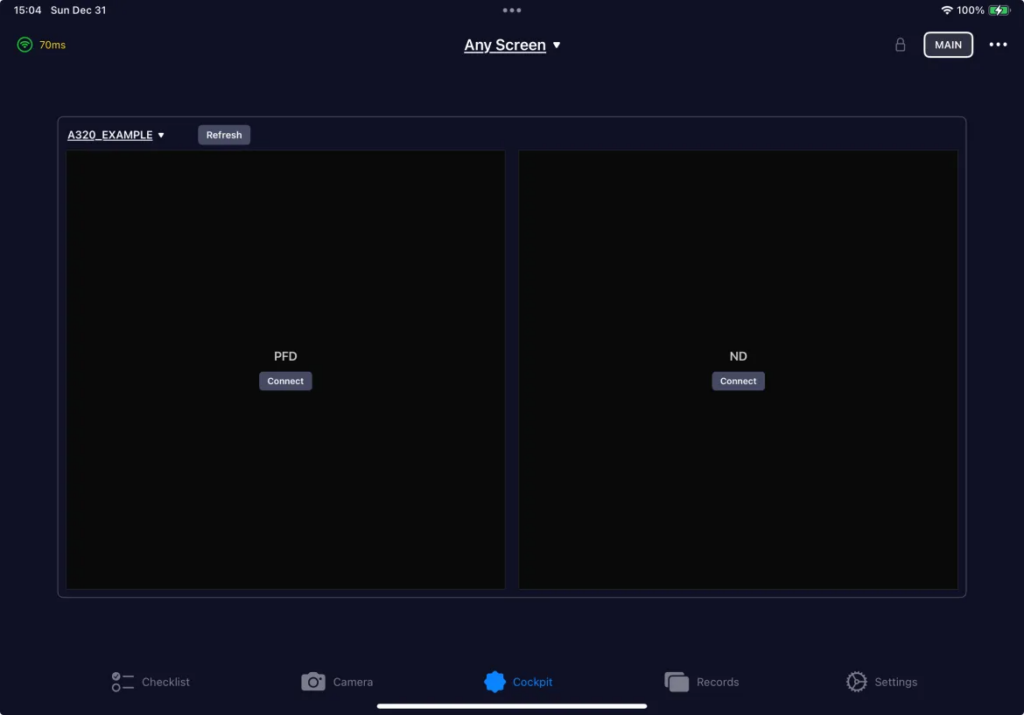
After starting SimFly Pad, go to the Cockpit page and select the Streming Screen panel(Called Any Screen before). If the connection is working properly, you will see an interface as shown in the image below. (Note that this interface may vary slightly with different versions.)
In the top left corner, where “A320_EXAMPLE” is displayed, it shows the currently selected window definition Profile. (This definition file is provided by SimFlyLinker. You can find the preset definition .ini files in the streaming_screens subdirectory of the SimFly Linker installation directory. Additionally, you can also add or modify according to the pre-configured files. The specific method will be introduced later in the text.)
By clicking on the top left corner, you can freely choose the Profile configured in SimFly Linker.
In the “A320_EXAMPLE” shown in the image above, two streaming screens, PFD and ND, are preset. After clicking “Connect,” the screen will prompt you to pop up the corresponding screens.
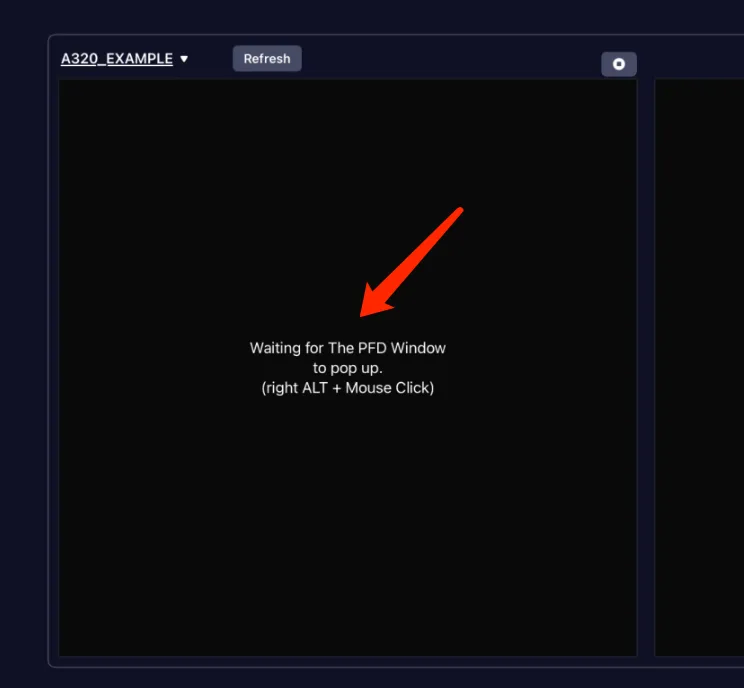
After completing the corresponding operations, you will be able to see that the images have been transmitted in real time.
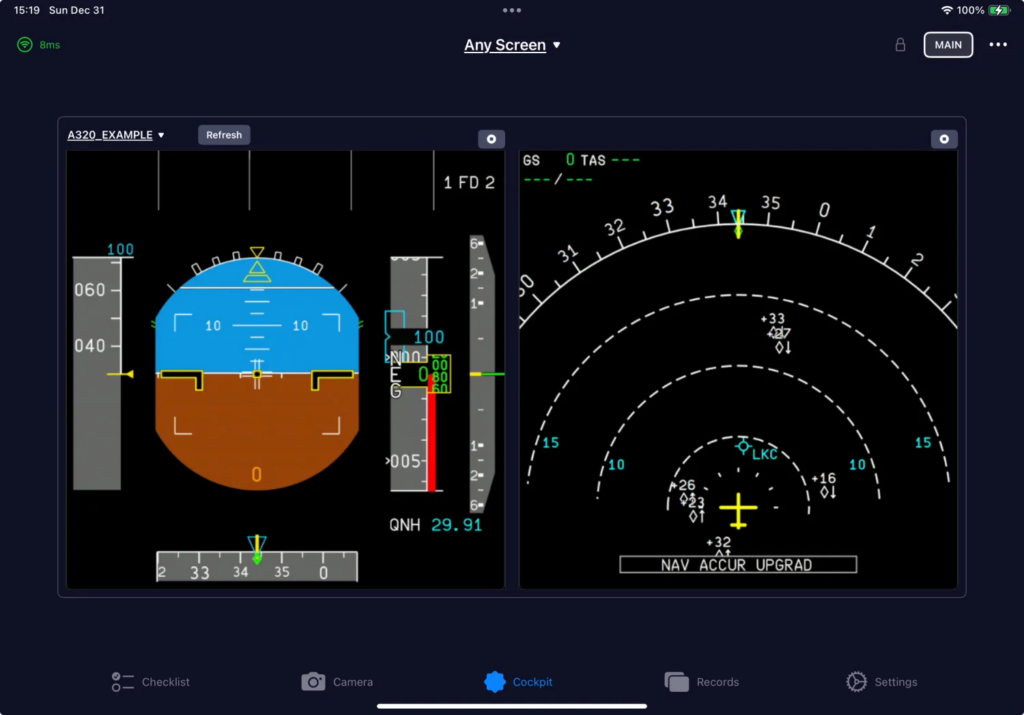
If you need to stop the video transmission, simply click the stop icon in the top right corner of the corresponding screen.
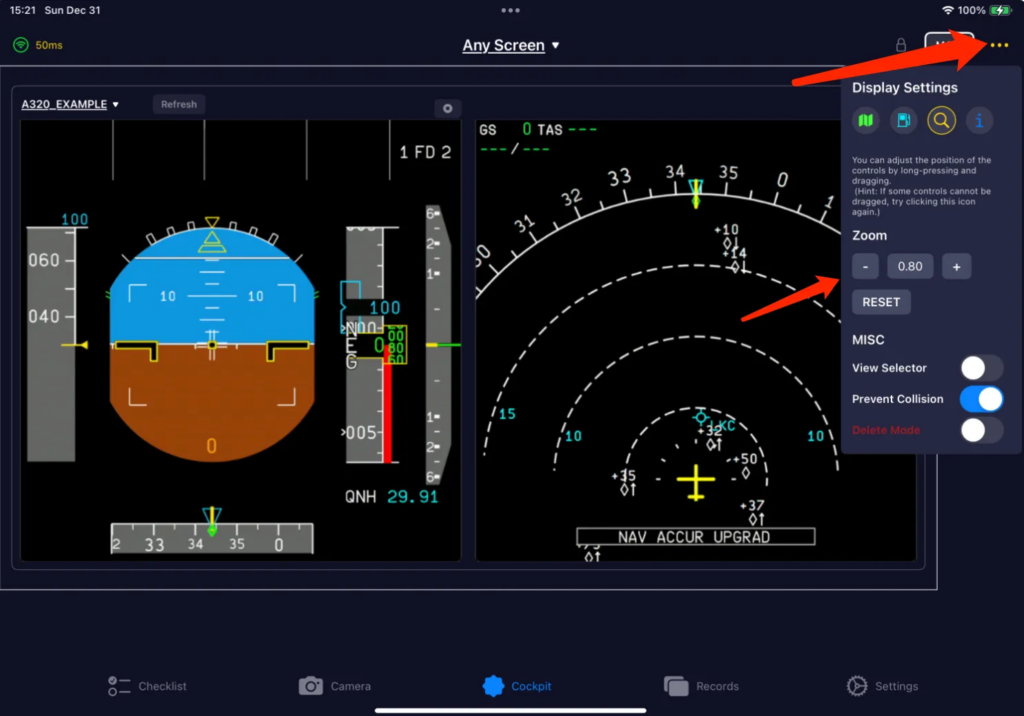
If you wish to zoom in or out on the image, you can click the “…” icon in the top right corner of the screen. In the pop-up interface, you can adjust the image’s scale.
Customizing Profiles
Of course, the three example Profiles provided may not fully meet your needs. In this case, you can adjust the configuration files yourself. The following will describe in detail how to adjust these configuration files.
The configuration files use the .ini format. Taking “A320_EXAMPLE” as an example, the content of its configuration file is as follows:
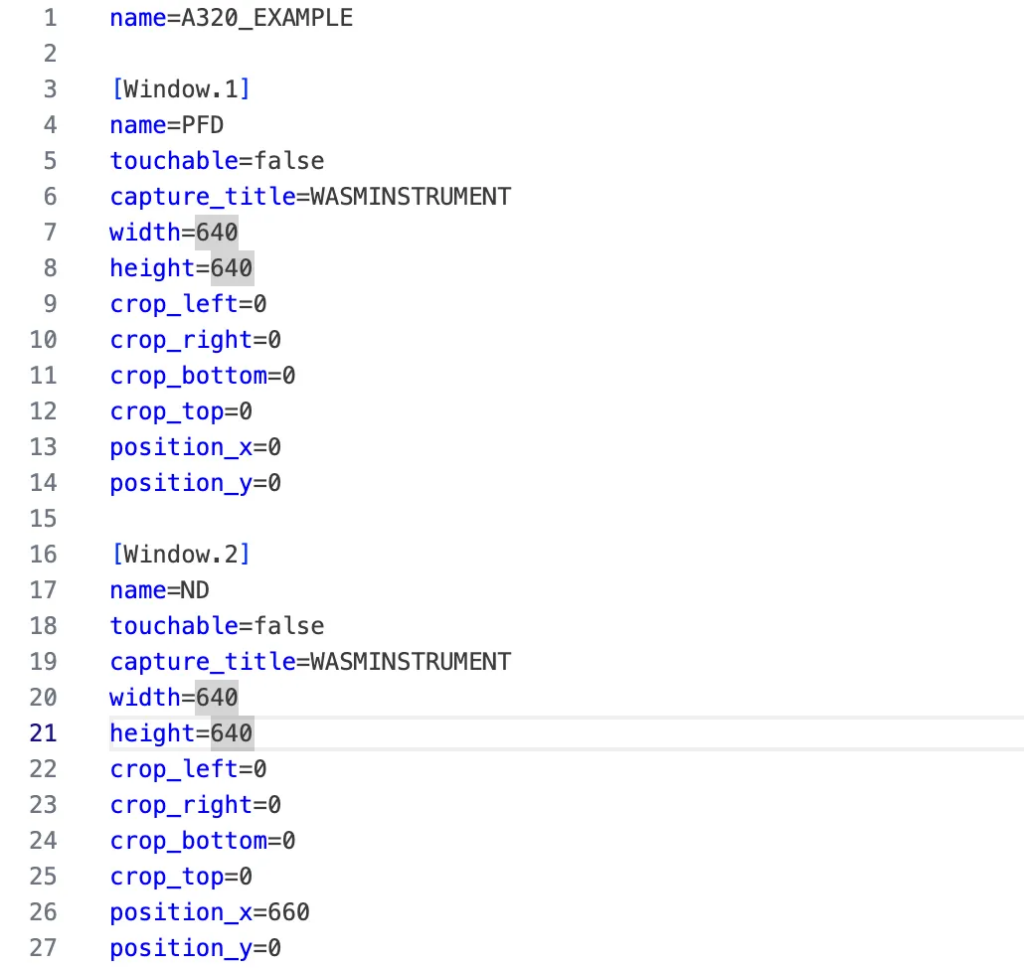
The first line, “name,” configures the name of this configuration file. In lines 3 and 16, we see two groups defined – Window.1 and Window.2. In Window.N (where 1≤N≤4), the definitions for each window to be captured are filled in. Their meanings are as follows:
- name: The name of the window (this will be used for display purposes).
- touchable: true or false. This field indicates whether this window supports touch control. (For screens that support touch control, a virtual display needs to be added in SimFlyLinker before streaming.)
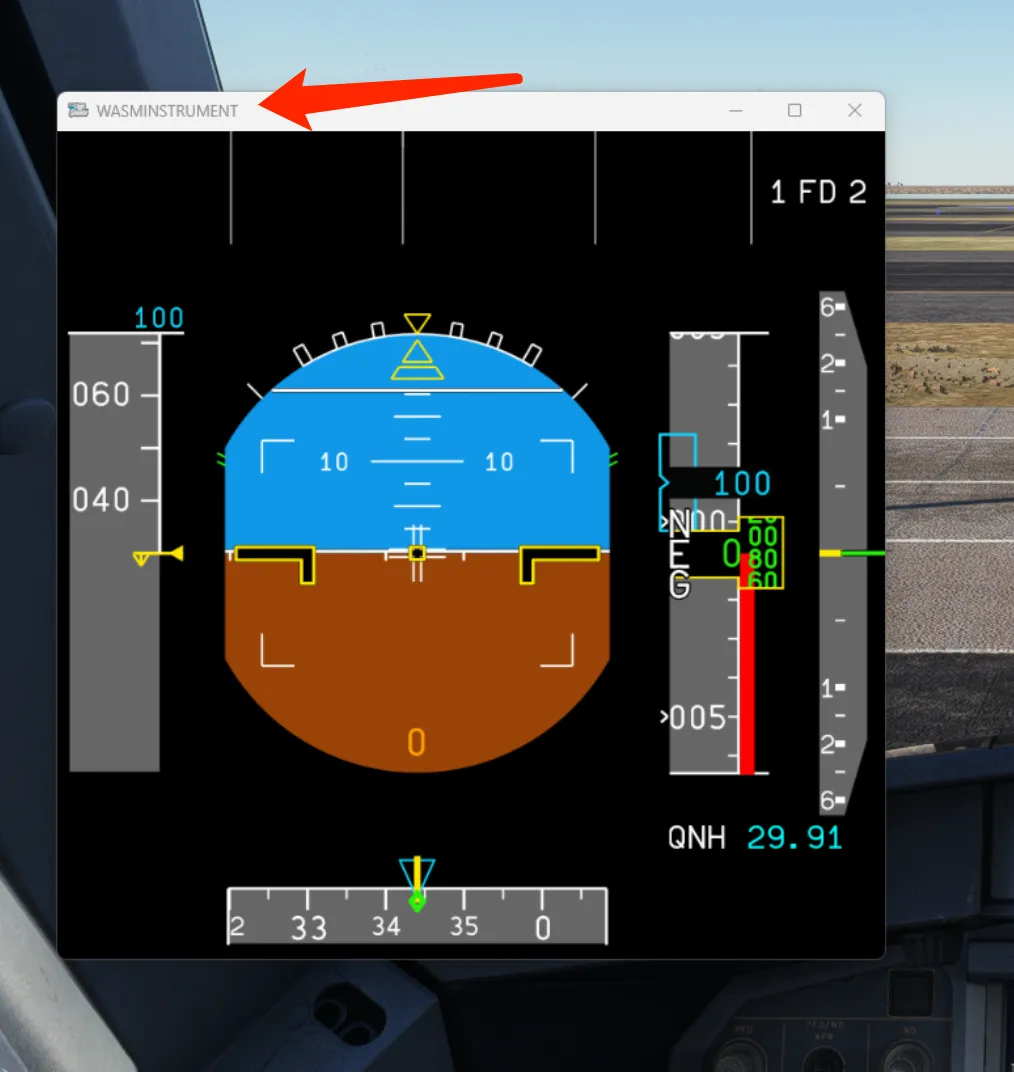
- capture_title:The title of the pop-up window. Note that this field is very important; it is the sole basis for SimFly Linker to identify and locate the window. For common instruments like FENIX A320 and PMDG 737, the title of their instrument pop-up windows is “WASMINSTRUMENT“. You can determine this by observing their window titles after they pop up.
- width/height: The width and height of the window, with a maximum size of 1200×900.
- crop_left/crop_right/crop_top/crop_bottom: If you need to crop the pop-up window (like the MFD3 of the B787), you can define these properties to do so.
- position_x/position_y:Defines the arrangement position of the window in SimFly Pad.
Capturing Multiple Windows with the Same “capture_title”
If you want to capture screens of four pop-up windows that all have the same window title (for example, the pop-up window titles for the FENIX A320’s PFD, ND, ECAM are all “WASMINSTRUMENT”), you can use one of the following two methods to capture the correct window.
Method 1: Pop Up Individually (Recommended)
In SimFly Pad, click the Connect button for one of the screens, then go to the game and pop up that window. Once you see that the image has been correctly transmitted, repeat this step for the other windows.
Method 2: Pop Up All, Then Capture One by One
You can first go to the game and pop up all the windows you need, and then click Connect in SimFly Pad. In this case, SimFly Linker will detect multiple windows that match the capture_title criteria. You will need to follow SimFly Linker’s prompts to complete the corresponding window selection in SimFly Linker.